Monday, July 28, 2014

Week 11, The Preponderance of Evidence


The benefits of organic food production on the environment and benefits to human health should seem quite evident, but we know that it isn’t to everyone.  This past spring Mac had the opportunity to have dinner with Dr. Charles Benbrook and the leaders of the National Organic Program while in Washington DC on organic business.  Dr. Benbrook, aka “Chuck”, is a well-respected researcher working with organic products. He enlightened the group with the preliminary findings of a study that was just recently published in the British Journal of Nutrition.  Like any robust conversation about science, the topic of whose science is better than whose came up. While any one aspect of a complex ecosystem management system may generate some refinement, the preponderance of evidence clearly indicates organic food production systems benefit us all. 


A few points about what we know to date:


Soil Fertility - 
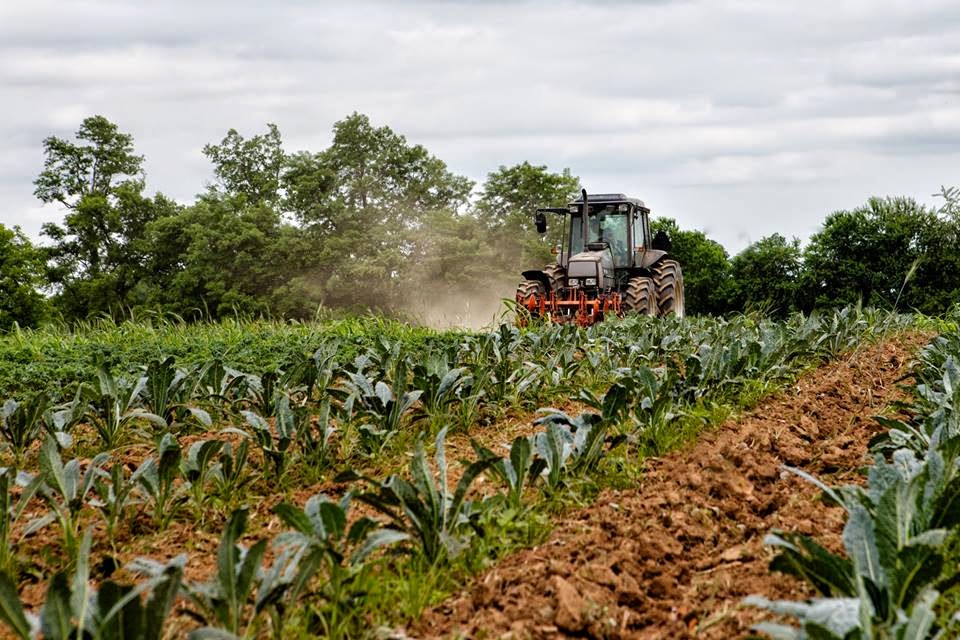
Commercial agriculture, which is a synonym for high chemical input farming, uses synthetic chemicals to add specific nutrients designed to be in the form that a plant wants. Garden-variety fertilizers like 10-10-10 are ten parts of Nitrogen-Phosphorus-Potassium. That’s it! What about the other hundreds, if not thousands of compounds plants need to grow and be healthy? Since these chemical fertilizers act like a salt in the soil, the microbes that can produce the multitude of other compounds are compromised. Oh, and science does document that often other industrial wastes like heavy metals are mixed with these fertilizers so they can be legally disposed of by land farming under EPA tolerance levels. At Elmwood Stock Farm, we get our nitrogen from cover crops and other plants we grow to capture it from the air. Our farm, and much of central KY, is blessed with high phosphorus soils (one reason why horses do well here.) Plus one for organics.


Insect Control – Commercial agriculture has access to hundreds of highly toxic chemicals designed to disrupt biochemical pathways, hormone systems, or impose a specific toxic compound to kill insects. Venture into a farm supply store and read some labels. Of course the ones for mites, fungus, and disease are in separate categories. The fine print, well below the skull and cross bones, makes reference to things like: wear a respirator and chemical applicator suit, do not breath the spray, dispose of properly, do not re-enter the field for so long, wait x number of days before harvest, etc.  As certified organic farmers, we are allowed to use a handful of products, derived from compounds found in nature only, if and when all other cultural controls prove ineffective - things like crop rotation, variety selection, good fertility, weed control, etc. Plus one more for organics.


Genetically Modified Organisms - Tinkering with the genetic code of plants, raised for human consumption, is just plain scary to us. This ramping up of the chemical treadmill is also intertwined with corporate consolidation of the food supply. Food we eat should not need a patent protection clause on the package. Organic food production does not allow the use of GMOs at any point, and is thoroughly verified by our third party certifier. Access to independent seed sources is becoming increasingly difficult with the consolidation of seed supply companies worldwide. Organics is gaining a little ground, and small seed suppliers have a robust business. Plus one more for organics. 


Many believe that organic farming systems are much better for the environment, and the humans that implement them, than commercial farming, as it is known today. After reviewing the recently published organic research, Chuck and his colleagues arrived at a similar conclusion.  He said, "This study is telling a powerful story of how organic plant-based foods are nutritionally superior and deliver bona fide health benefits".  After careful consideration of 343 independent individual studies, the team agrees the preponderance of evidence shows that organic foods have significantly higher antioxidant levels, superior sensory profiles, less toxic pesticide residues, and better balance of nutrients than foods raised under high chemical input systems.


It just stands to reason:

     1.  If you hurt the soil microbes by adding salts with limited nutrients, the plants will take up lots of those few things and less of the others, limiting the plants’ ability to produce the diverse compounds it needs for growth and reproduction. Therefore, products are less nutritionally complete when consumed. Plus one more for organics.


     2.  If you apply numerous toxic compounds into a farming system, the diversity of species in that environment will be decreased. One of the laws of nature is that the more diverse an ecosystem is, the more stable it is. Plus one more for organics.


     3.  If you apply toxic chemicals to a food crop to control insects, mites, and fungi, there is a higher likelihood there may be residues on the food you eat. Plus one more for organics.


It is great when science can document what seems reasonable, organic foods are better when all things are considered. Thank you for the opportunity to extend the benefits of our organic farming business to the benefit of your and your family’s personal health.
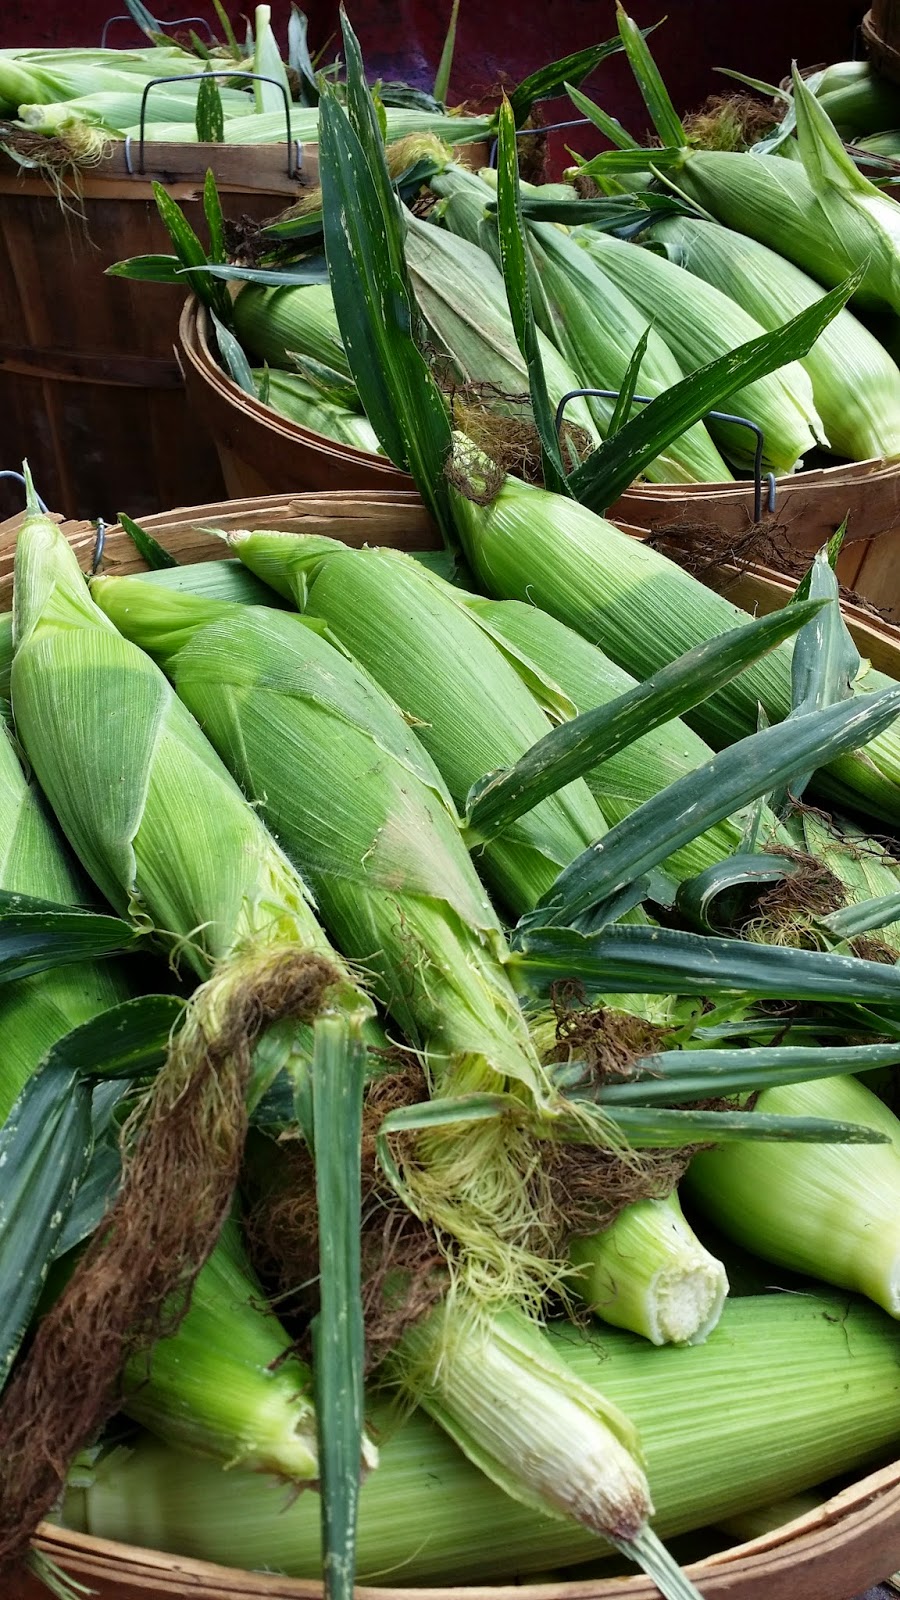
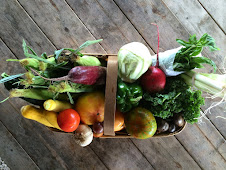
In Your Share:


  • Sweet Corn
  • Cucumber
  • Garlic
  • Melon
  • Sweet Pepper 
  • Potatoes 
  • Yellow Squash
  • Heirloom Tomato 
  • Green Zucchini 
  • Broccoli 
  • Celery


Recipes: 


Corn and Zucchini Flan, our thanks to a CSA member for sharing!

4 large eggs

1/4 cup half & half

4 ounces cream cheese, softened

1 T cornstarch

1/2 t salt

1/4 t black pepper

1 medium zucchini, grated & squeezed dry

1 1/2 cup corn kernels

2 T fresh basil, chopped

Preheat oven to 375 degrees F. Prepare six 6-ounce ramekins or custard cups by spraying lightly with nonstick cooking spray and set aside.

In a large mixing bowl, combine eggs, half & half, cream cheese, cornstarch, and salt & pepper; beat with an electric mixer on medium speed for 1 minute, or until well combined. Stir in zucchini, corn and basil.

Spoon mixture equally between the ramekins; place ramekins on a baking sheet and bake for 30-35 minutes or until puffed slightly golden brown. Cool for 5 minutes before serving.


Zucchini Grinders, thanks to a CSA member for sharing this nice idea!

1 T butter

2 medium zucchini, cubed

1 pinch red pepper flakes

salt and pepper to taste

1 cup marinara sauce

1 1/2 cups shredded mozzarella cheese

4 (6 inch) sub sandwich or ciabatta rolls, split

Note:  Zucchini cubes can be larger for softer rolls, which will tend to adapt to the size and shape of the zucchini; if using ciabatta or similar “hard” rolls, make cubes smaller.

Preheat the oven to 350 degrees F.  Melt butter in a skillet over medium heat. Fry the zucchini in butter until browned and slightly tender. Season with red pepper flakes, salt and pepper, and stir in the marinara sauce. Cook and stir until sauce is heated.

Spoon a generous amount of the zucchini mixture into each sandwich roll. Top with a handful of shredded mozzarella. Close the rolls, and wrap individually in aluminum foil. Bake for 15 minutes in the preheated oven, until bread is heated through, and cheese is melted.   
   

Pan Cooked Celery with Tomatoes and Parsley, a Martha Rose Shulman recipe – she says you can serve this as a side dish or as a topping for grains or pasta. It is adapted from a recipe in “Cooking From an Italian Garden,” by Paola Scaravelli and Jon Cohen. Serves 4.

1 bunch celery, trimmed and cut into 1-inch pieces

1 tablespoon extra virgin olive oil

4 garlic cloves, minced

1 anchovy, rinsed and chopped (optional)

1 14-ounce can chopped tomatoes in juice – or use fresh

3 tablespoons chopped flat-leaf parsley

Pinch of sugar

Salt and freshly ground pepper to taste

Place the celery in a steamer above 1 inch of boiling water. Cover and steam 5 minutes, until just tender when pierced with a knife. Remove from the heat and drain, set aside.  Heat the oil over medium heat in a large, heavy skillet and add the garlic. Stir until it smells fragrant, about 30 seconds, and add the anchovy if using, tomatoes, 2 tablespoons of the parsley, a pinch of sugar and salt and pepper. Stir together, then stir in the celery. Cook, stirring often, until the tomatoes have cooked down and the mixture is fragrant, about 10 minutes. Taste and adjust the seasonings. Stir in the remaining parsley just before serving. 


Monday, July 21, 2014

Week 10, What Makes Beautiful Sweet Corn?


Sweet corn season started for us right around the Fourth of July Holiday this year. The plan is to have another patch ripen every ten days or two weeks into September. Each patch is a little different for various reasons, but will be beautiful in its own right.

First, there are thousands of varieties to choose from that go way beyond Silver Queen and Peaches ‘n Cream. Silver Queen was the gold standard for a generation as corn breeders selected the best when evolving away from corn raised to feed livestock. Back then, “cow corn” could be harvested in the “roasting ear” stage when it was still milky and the starch content still low. Silver Queen had higher sugar content before it converted the sugar to starch, which is more stable for long-term storage. Now, all sweet corns are bred to be sugary and bred for the transition to starch to be delayed. Essentially these days, all sweet corn you will see in any marketplace will be known as “super-sweet” varieties that allow growers to get the product to consumers in the sugary state. For the real Silver Queen variety, they say you should have the water hot before you pick it as it loses sweetness by the minute. In addition to this sweetness attribute, varieties differ in days to maturity, color pattern, husk coverage, cold or heat tolerance, pest resistance, and many others. Suffice it to say, a single variety like Ambrosia may not be the best for all seasons.

We will plant several varieties on the same day with differing maturity dates. They are managed as one crop, yet the harvest is spread out over several weeks. The interval between pickings is planned out by us, but in reality is totally dependent on the weather during the growing season. Weed control is a major factor in raising a good patch of corn. As organic farmers, we plant with the contours of the land and use cultivation equipment to eliminate weeds both between the rows and between the plants in the row. Growers that are not certified organic may use some herbicides for grassy weeds, others for broadleaf weeds at the time they plant. These extremely toxic chemicals have numerous warnings on the label concerning human exposure for the applicator and effects on the environment as well as adverse effects on surface and ground water. Now there are Genetically Engineered (GE) varieties that allow farmers to also spray herbicides directly on the corn crop and the weeds, magically burning back the weeds, while not affecting the corn. Hmmm. Some weed species are adapting and showing resistance to this technology to the point that none of the herbicides are effective on them anymore.

Insect pest management is the most challenging aspect of sweet corn production. There are essentially no problems until the last few days as the ears form. Some insects feed on the silks as they emerge from the developing ear. Each individual silk is actually a tube that carries the pollen to the egg that forms a kernel if fertilization is complete. Hot dry weather can also dry out the silks, disrupting the fertilization pattern. This is often the case when those kernels at the very tip are not formed. We look for varieties with good husk coverage as it impedes the ability for insects to burrow into the ear to access the juicy sweet kernels. The corn earworm is the most notable of these. Our organic certifier allows us to use a naturally occurring insect virus, called Bacillus Thuringiensis that eliminates the larval stage of that insect before it penetrates the ear. The timing of the application of this material is so critical to the effectiveness of it; often control may not be achieved. Determining when the pests hit a threshold level indicating the need to use the material is tricky in itself. No organic farmer is allowed to use any product like this unless all other cultural controls are documented as ineffective. Natural enemies, good husk coverage, and vigorous growth is often enough. We rarely apply these materials, opting for a less is more mentality. There are now GE varieties of sweet corn that have this same naturally occurring insect virus implanted into the chromosomes of the corn itself. In these, every cell in the plant carries this trait, so any pest of this type is killed when it eats any part of the plant. What this also means is it is IN the kernel you consume! Insects are already adapting to this technology and resistant species are adapting to persist in this altered environment. Also, the stalks are not breaking down after harvest because the insects that normally feed on such material are reduced or eliminated.

Birds, raccoons, and deer can also wipe out a corn patch. They, like the insects and humans, wait for the kernels to ripen before going in for a meal. Birds will tatter the ends eating the kernels out on the tip. We use inflatable balloons with an eye painted on them for scarecrows. Traditional scarecrows work in small gardens but we need something out in the middle of the patch. Raccoons will pull the ears from the stalk, take a bite, go on to the next one, and consume countless ears overnight. They may come from miles around depending on availability of other sources of food. We use a version of our electrified poultry netting to keep them out.

We used to not include the non-perfect ears in Farm Shares, but you told us again and again in your end-of-season surveys that you would rather have blemished organic corn over conventional corn or no corn. So, you may see ears of sweet corn in your share that show some insect damage, poor kernel development due to dry weather, or we may have even cut the ends off for you. We think this is highly preferable to growing GE varieties stacked with numerous traits so consumers will see the perfect ear of sweet corn.  Enjoy your Elmwood Stock Farm organic, non-gmo sweet corn, for true beauty is in the eye of the informed beholder!
 

In Your Share


Green Beans

Green Cabbage

Sweet Corn

Cucumber

Melon

Yellow Squash

Heirloom Tomatoes 

Green Zucchini 

Okra

Recipes


Mexican Grilled Corn
3 tbsp. butter
1 tsp. chili powder
½ tsp. salt
½ tsp. ground cumin
½ tsp. garlic powder
6 fresh ears of corn, husked and cleaned
Combine butter, chili powder, salt, cumin and garlic powder; brush over corn.  Wrap corn individually in aluminum foil.  Grill over medium heat (300-350 degrees) 30 to 40 minutes, turning every 10-15 minutes.

Smothered Okra
4 bacon slices
2 pounds okra, cut in pieces
1 ½ tbsp. wine vinegar
1 ½ celery ribs, chopped
1 medium onion, chopped
2 garlic cloves, chopped
1 bell pepper, chopped
1 pound tomatoes, chopped (or 16 oz. can whole tomatoes coarsely chopped)
1 tbsp. Worcestershire sauce
1 tsp. salt
¼ tsp. pepper
Cook bacon in a skillet over medium heat until crisp; drain, reserving ¼ cup drippings in pan.  Crumble bacon and set aside.  Cook okra in hot drippings over medium heat; add vinegar, stirring well.  Reduce heat add celery, onion, garlic and bell pepper.  Cook 5 minutes.  Add tomatoes, Worcestershire sauce, salt and pepper to vegetable mixture, stirring well; simmer, stirring occasionally, 10 minutes.  Sprinkle with bacon.  Serves 6.

Szchuan Green Beans, from Dinner With Julie.com; serves 4.
1/2 lb (ish? a small bunch) green beans, stem ends trimmed
canola or mild olive oil, for cooking
sesame oil, for cooking (optional)
2 tsp. grated fresh ginger
3-5 garlic cloves, thinly sliced
2 green onions, chopped
1 Tbsp. soy sauce
1 tsp. sugar
1 small squirt sriracha (chile paste)
toasted sesame seeds (totally optional)
Set a heavy skillet over medium-high heat and add a drizzle of oil (I use canola) and sesame oil. Add the beans and cook until they start to turn golden. Add the ginger, garlic, green onions, soy sauce, sugar and sriracha (as much as you dare) and cook for a few more minutes, tossing them around in the pan, until the garlic is golden and the beans are deeper golden and sticky.  If you like, sprinkle with sesame seeds.

Zucchini and Walnuts
¼ cup butter
½ cup walnut pieces
2 ½ cups coarsely shredded zucchini
½ tsp. lemon juice
1 tsp salt
½ tsp. pepper
Melt butter in a skillet over medium heat; add walnuts and cook, stirring constantly, until toasted (do not burn).  Transfer to a bowl, reserving drippings in skillet.  Sauté zucchini in hot drippings 30 to 60 seconds; sprinkle with lemon juice.  Remove from heat and add walnuts, tossing well. Serves 4.
 
Grilled Cabbage Wedges with Spicy Lime Dressing
serves 8 as a side dish
Juice of 3 limes (1/4 cup)
1/4 cup extra virgin olive oil
1 teaspoon fish sauce,optional
2 garlic cloves, rough chopped
1/4 cup cilantro leaves
1/2 teaspoon salt
1/2 teaspoon cayenne
1/4 teaspoon sugar
Lime wedges, to serve
1 head green cabbage
Grapeseed or canola oil
Heat a gas or charcoal grill. Whiz the limes, olive oil, fish sauce, garlic, cilantro, salt, cayenne and sugar in a small chopper or blender until the sauce is pale orange and the garlic is pulverized. Set aside.

Remove the loosest, toughest outer leaves from the cabbage, and cut into 8 evenly sized wedges. Do not remove the stalk or inner core. Lightly brush wedges with grapeseed or canola oil. Place wedges on the grill and cover. Cook for 5 to 7 minutes, or until the edges of each layer are blackened and the cabbage is beginning to soften. Flip each wedge over, cover the grill, cook for an additional 5 to 7 minutes on the other side. Remove the cabbage when it is beginning to wilt, but is still firm in the middle. (This will also be somewhat a matter of taste) If necessary, turn the heat down or move the wedges to a cooler part of the grill so they don't burn. But don't be afraid of those blackened edges; you want a lot of grill and char marks on the cabbage to give it smoky flavor. Take the cabbage off the grill and arrange the wedges on a plate. Pour the dressing over top and serve with wedges of lime.

Monday, July 14, 2014

CSA News, Week 9


USDA funded research out of the University of Connecticut looked at perceptions and misperceptions of local and organic food with comparisons of US and Canadian consumers. Overall, it found that consumer misperceptions regarding organic and local are widespread. US consumers were more likely to believe local was organic. One in four US participants perceived organic to be a characteristic of local com-pared to one in five Canadians. Another 17% said organic and local were the same thing. Researchers reported “participants in our study often showed naïveté, thinking when they buy local, there are no pesticides in the product or that organic is local when it is not.”  This is striking because when participants were asked how knowledgeable they were on characteristics of local and organic, the more they thought they were knowledgeable, the more misperceptions they had between local and organic. 


      While many suggestions of how to incorporate a local food-sourcing plan into your lifestyle can be found on the internet, a CSA member shared her 4 top tips with us last season:


“Accentuate the positive.  Don’t set yourself up for failure by creating ironclad rules. Focus instead on what you are trying to accomplish. Sourcing anything locally is a success, especially if you would never have thought to do so before.  Every time you buy something from a local producer, you are creating a positive ripple in the local economy. 


Get a reality check. Go to your usual grocery and ransack the shelves looking for locally produced foods. Your cart may have about two items rolling around in it by the time you get to the checkout. Don’t worry; you have just learned something (in very concrete, unforgettable terms) about how far most food is shipped before someone eats it. You have accomplished something.


Ask questions.  Produce managers in supermarkets can be a great source of information. Most of them do the buying, so they can tell you the source. You’ll find that some stores are much more committed to localism than others.  And if you can make it to a farmer’s market on the weekend, a couple of queries can reveal fascinating details about where your food comes from. Finding out the story makes the process of preparing and eating food far more pleasurable.


Make every choice count, whether it’s local or not. If you commit to eating better, you have to make some decisions about the sourcing of your food. Let’s take coffee as an example. You might take the opportunity to quit your 3-cups-a-day habit, or you might replace your jarred instant with fair-trade organic whole beans. You take something in your kitchen that’s questionable at best and replace it with something that actively does some good.”


      As consumers, when we become more educated on organic, local, natural and other descriptors, we demand more accountability in the products we purchase, appreciate the integrity of third-party verification, and are more confident in the foods we feed to our family. Certified organic is the most stringent holistic food production system in the world, and is third party verified as such. Of all the attributes one can use when sourcing, USDA organic certification does provide a benchmark. Locally sourced, high quality food benefits the local economy. Put the two together and choose local AND organic, you’ll have the best of both!

In Your Share 


Broccoli

Celery

Sweet Corn

Cucumber

Green Beans

Kale Greens

Kohlrabi

Yellow Squash

Green Zucchini


Recipes


Potato, Squash, & Goat Cheese Gratin, serves six, our thanks to a CSA member for sharing this quick-to-prepare recipe from thekitchn.com.  She used lemon goat cheese and half-n-half with fantastic results.


2 medium yellow squash, about 1/2 pound
4 small to medium red potatoes, about 1 pound
3 tablespoons olive oil
4 ounces goat cheese
Salt and freshly ground black pepper
1/4 cup whole milk
1/3 cup freshly grated Parmesan cheese
1 tablespoon thinly sliced basil or thyme leaves (optional for garnish)


Preheat oven to 400°F. Lightly grease a 1 1/2 to 2-quart casserole dish with a drizzle of olive oil.


Use a mandoline or chef's knife to slice the squash and potatoes into very, very thin slices, 1/8-inch or less. Toss the sliced vegetables with the 3 tablespoons olive oil in a large bowl.


Place 1/3 of the squash and potato slices in the bottom of the dish — no need to layer them squash-potato-squash; just spread evenly — then season with salt and pepper. Top with half of the goat cheese, scattered evenly in large chunks. Repeat with another 1/3 of the vegetables, seasoning again with salt and pepper and topping with the other 1/2 of the goat cheese. Finish by layering on the final 1/3 of the vegetables and seasoning with salt and pepper.
 

Pour the milk over the entire dish. Top with the parmesan cheese. Bake, covered, for 30 minutes, then uncover and bake 15 more minutes, until the top browns. Scatter on the fresh basil, if using.


Benedictine

Process 1-2 peeled cucumbers in the food processor and drain processed cucumbers in a metal strainer or using a cheesecloth.  Once drained, mix cucumber puree with 8 oz. of room temperature cream cheese and mix well.  Season with garlic powder or salt.  Serve on toast with lettuce, tomato, and bacon for an Elmwood Stock Farm favorite.  Benedictine can be enjoyed as a sandwich spread, or as a dip for raw veggies or crackers.  Store in the refrigerator.


Country Green Bean Bundles

1 pound green beans (washed and ends trimmed)
1/3 red bell pepper
1 clove of garlic
1 small onion
7oz bacon
2 tbsp flour
1 tsp mustard powder
½  tsp onion powder
1 ½  cup beef broth


Peel the bell pepper with a vegetable peeler and finely mince it along with the onion and garlic.  Pre-boil the beans in very lightly salted water until they are ‘al dente’, so to speak and rinse in cold water when done.  To make a roux based sauce, mix 2 slightly heaping tbsp flour with 1 tsp mustard powder and 1/2 tsp onion powder and give everything a good stir.  Heat 2 tbsp butter and cook the onions over low heat for about 5 minutes while stirring occasionally.  Then add the bell pepper and garlic and cook for another 5 minutes.  Add the flour mixture to the roux and cook on low for 1-2 minutes and then mix in the beef broth.  Dip 5-10 beans in the sauce and wrap in bacon.  Beans can be grilled or baked/broiled in the oven.  Preheat oven to 400 degrees and bake 10-15 minutes or until golden brown.  Flip bundles to evenly brown the bacon.  Note:  You can make these beans without the bacon and add or omit any ingredients that you wish.


Curried Zucchini & Couscous, our thanks to a CSA member for sharing this Eating Well recipe, makes 4 servings; she added white raisins with winning results!


2 T extra-virgin olive oil

2 medium zucchini or other summer squash, diced

¼ C finely chopped onion

1 C water

1 T lime juice

1 tsp curry powder

½ tsp ground cumin

½ tsp salt

¼ tsp freshly ground pepper

1 C couscous

1 C grated carrot

¼ C slivered almonds, toasted 


Heat oil in a large saucepan over medium heat. Add zucchini and onion and cook, stirring occasionally, until starting to soften, about 3 minutes. Transfer to a large bowl and set aside. To the pan, add water, lime juice, curry, cumin, salt and pepper.  Bring to a boil. Stir in couscous. Remove from heat, cover and let stand for 5 minutes. Fluff with a fork. Add the couscous and carrot to the bowl with the zucchini; stir to combine. Serve topped with almonds.

 
Waldorf Salad

3 apples chopped (peel on)

1 bunch celery chopped (leaves can be included or not)

¼ C walnuts, chopped

2 tablespoons mayonnaise

1 tablespoon sour cream


Combine apples (approx. ½ inch chunks), celery and walnuts in a mixing bowl.  In a small bowl combine the mayonnaise and sour cream and fold in the apple mixture.  Transfer salad to a bed of lettuce and serve immediately.


Zucchini Butter, recipe found on Food52 online.  It makes about 2 cups, and can be enjoyed on toast, or as a side dish all summer long whenever you have squash or zucchini!  Thanks to a CSA member for sharing!


2 lb zucchini or assorted summer squash (feel free to use less or add extra -- cooking times will vary)

¼ cup olive oil or butter

2 minced shallots, garlic, or combination of both

salt and pepper


Coarsely grate the zucchini. Let it drain in a colander for 3 to 4 minutes or until you are ready to begin cooking. To hasten cooking time, squeeze the water out of the zucchini by wringing it in a clean cloth towel.

In a deep skillet, heat the olive oil/butter. Sauté the shallots or garlic briefly. Add the zucchini and toss. Cook and stir over medium to medium-high heat until the zucchini reaches a spreadable consistency, about 15 minutes. If you scorch the bottom, turn the flame down! (And scrape those delicious bits into the butter for added flavor -- you can splash in a little water to help deglaze the pan.) The zucchini will hold its bright green color and slowly caramelize into a nice vegetable jam.

Monday, July 7, 2014

Week 8, CSA News


From the Farm 


Food security is an issue seldom talked about since the grocery stores are always brimming with fresh and frozen produce, meats, processed foods, and dry grains. In reality, the nation’s food supply is currently on a truck, en-route to one of those stores. If anything were to disrupt the movement of those trucks, the shelves would be empty in three days. Picture the stores after a big snow!


The fact of the matter is that Big Food companies operate much the same way as retail food stores. The cabbage company does not tell their farmers to pick cabbage until an order has come from a cole slaw company that needs to fill an order for a fast food restaurant. The efficiency and capacity of Big Food to keep all stores and restaurants full of everything in the freshest possible way is a marvel of ingenuity. The technology that has evolved is fascinating. An entire tractor-trailer load of cabbage can be cooled down to 35 degrees in a matter of minutes, and kept there throughout the delivery process. The concern is if the trucks stop rolling, or fuel prices skyrocket, or labor shortages emerge, the whole system breaks down. Your relationship with us is one method of food security for your family and less dependency on Big Food.  We take pride in knowing who our customers are and where our veggies are going after harvest.


Another form of food security at Elmwood Stock Farm is our relationship with Faith Feeds and God’s Pantry. Typically there are several boxes of veggies each week over and above what goes into the shares.  We deliver regularly to God’s Pantry or other food banks, where fresh produce gets distributed through coordinated networks to families that have little access to fresh vegetables. This week, Faith Feeds sent volunteer gleaners to harvest produce that was left in the field after our last harvest. These boxes will be distributed through churches and community shelters in Lexington and Central Kentucky – an important part of the Community aspect of a CSA program.


In Your Share


Broccoli

Carrots

Cucumber

Green Beans

Sweet Corn

Purple Top Turnips
Green Cabbage

Fennel

Lettuce
 

Recipes


Carrot Chips

2 large carrots (or 3 medium)
1/2 teaspoon olive oil (or melted coconut oil)
1/8 teaspoon sea salt

Preheat oven to 350°F.  Wash and peel the carrots. Using a mandoline slicer or a knife, tilt the carrot, and thinly slice diagonally to make oval-shaped pieces — if they're too thick, they'll be soft instead of crunchy.   Place the carrot slices in a bowl, and toss with olive oil and salt.  Lay the carrots in a single layer on a cookie sheet lined with a Silpat or parchment paper.   Bake for 15 to 20 minutes, or until the carrots are dry and crisp. Watch them carefully toward the end, as they can burn quickly.


Broccoli and Orzo Casserole, recipe shared by a CSA member from FoodNetwork website.

3 T unsalted butter, plus 1 tablespoon melted and more for greasing dish

Kosher salt

6 C broccoli florets (about 12 ounces)

2 T all-purpose flour

1 small onion, diced (about 1/2 cup)

2 cloves garlic, minced

2 ½ C whole milk

1 ½ C shredded Havarti

¼ C sour cream

3 T grated Parmesan

Freshly ground black pepper

½ C panko bread crumbs

Preheat the oven to 375 degrees F. Butter a 2-quart casserole dish.  Bring a large pot of generously salted water to a boil. Add the orzo, stir and cook for 5 minutes. Add the broccoli florets and cook until bright green, about 1 minute. Strain and set aside.

Heat a large pot or Dutch oven over medium heat. Add the butter and flour, whisk together and cook for about 1 minute. Add the onions and garlic and cook, stirring, until the onions have softened, about 5 minutes. Whisk in the milk, bring the sauce to a low boil, reduce to a simmer and simmer gently for about 5 minutes. Turn off the heat and add 1 cup of the Havarti, sour cream, 2 T of the Parmesan, 1 tsp salt and pepper to taste. Gently fold in the broccoli and orzo.

Transfer the mixture to the buttered casserole dish. Sprinkle with the remaining ½ C Havarti and 1 T Parmesan. Toss the breadcrumbs with the remaining 1 T melted butter in a small bowl. Season with salt and spread evenly over the casserole. Bake until brown and bubbly, about 30 minutes.


Three Bean Salad with Creamy Lemon Dressing

Fresh seasonal salad featuring crisp yellow and green beans, lots of basil, and a tangy lemon-yogurt dressing

Dressing

½ cup plain Greek yogurt - whole milk

¼ cup extra virgin olive oil

3 tablespoons fresh lemon juice

½ teaspoon finely minced garlic

½ teaspoon kosher salt

Salad

1 pound green beans, washed, root end trimmed

1 pound yellow beans, washed, root end trimmed (or use double green ones)

2 tablespoons olive oil (to sauté onions)

2 medium red onions, sliced in half through the root and then thinly sliced

¼ teaspoon salt (for the onions)

3 ripe plum tomatoes

1 15-ounce can cannellini beans, drained and rinsed

½ cup, packed basil leaves, washed, dried, finely chopped

Kosher salt and fresh ground pepper, to taste

Dressing In a small bowl whisk yogurt and olive oil until creamy. Add lemon juice, garlic and salt, and whisk until creamy and fully combined. Set dressing aside.

Salad Fill a large pot halfway with water and 2 teaspoons of salt. Bring to a boil. Add beans and cook until crisp-tender, 4-5 minutes. Using tongs, transfer beans to a large bowl of ice-water to stop the cooking process. Drain and refill the bowl with cold water. Drain beans again and set aside.  Heat 2 tablespoons of olive oil in a medium skillet. Add onions and cook, over medium-low heat, stirring occasionally, for 10 minutes, until soft. Sprinkle with ¼ teaspoon salt. Set aside to cool.  Slice tomatoes in half lengthwise. Pull out the seeds and watery pulp. Dice the flesh. Set aside.  In a large bowl, combine green and yellow beans, onions, tomatoes, basil, and cannellini beans. Pour dressing on top and toss to combine. Season with salt and pepper, to taste. (Can be made a day ahead. Let salad warm at room temp for 15 minutes or so and toss, before serving)


Raisin Carrot Salad

4 c shredded carrots

1 can (20 oz) crushed pineapple, with juice

1 c raisins

3/4 c mayo

1 Tbsp sugar

1/2 Tbsp fresh lemon juice

Chill all ingredients except sugar at least 30 minutes. Dissolve the sugar in the pineapple, then combine everything gently in a large bowl and enjoy. 


Crispy Turnip Fries, recipe from BigOven.com. Try adding sliced carrots, beets or other root veggies for a colorful oven-fry medley. Serves 4.

3 medium turnips

1 ½ T olive oil

1 tsp salt and pepper

Preheat oven to 425°F. Slice turnips matchstick style. Place in bowl and coat with 1 tablespoon of olive oil (may consider using higher heat oil to avoid transfat opportunity from breakdown of oil). Next coat with salt and pepper. Oil aluminum pans with remaining ½ T of olive oil. Place turnip matchsticks on pan and place in oven. Set timer for 10 minutes, rotate pan and turnips at 10 minutes. Place back in oven for another 10 minutes. Check for doneness, turn on broiler and broil on high for 5 minutes for final crisping.

 
Pickling Carrots Pickled carrots make a wonderful condiment with curry, and add a tangy, sweet and sour note to salads.

½ lb carrots, peeled and cut into 2’’ match sticks

1 tbsp. coarse salt

1 cup rice wine vinegar

2 tbsp. light brown sugar

crushed red chili pepper flakes, to taste
Place the carrots in a bowl and toss with the salt. Allow to sit for 1 hour. Drain well.  Meanwhile, combine the vinegar, brown sugar, and chili flakes in a small saucepan. Heat over moderate heat until the sugar dissolves. Allow to cool to room temperature. Add the vinegar mixture to the carrots and toss well. Allow to marinate for 1-2 hours before serving, or store covered in the refrigerator for up to 2 weeks. Yield: about 1-1/2 cups.